keitaro Posted March 21, 2011 Share Posted March 21, 2011 all right i have had it with this train ......... about to toss it out the window. so far i have this. if i run all Tomix TN it derails because the door decal rubs on the coupler causing it to derail. mostly on the cars with the trains front face. secondly if i place back on the rapido couplers the carriages uncouple on hills and corners combo of both reasons. this is realy annoying grrrrrrrrrrrrrrr i give up on this for now as i just spent 4 hours trying combo and even modding the coupler to no avail Link to comment
Guest ___ Posted March 21, 2011 Share Posted March 21, 2011 you should just mail that train to me, as I can live with rapido couplers Link to comment
keitaro Posted March 21, 2011 Author Share Posted March 21, 2011 It uncouples with rapidos on any form of incline... Once on a flat as well. Link to comment
Guest ___ Posted March 21, 2011 Share Posted March 21, 2011 I'd just glue the couplers together ^_^ JK But I am going to split this thread in half me friend, and put the issues pertaining to the couplers under "Train Doctor" I'm a lazy man, I'll just move the entire thread over there. Link to comment
keitaro Posted March 21, 2011 Author Share Posted March 21, 2011 According to micro ace my kiha uses f0003 So I bought tomix 0374 As per http://www.jnsforum.com/index.php/topic,1586.0.html Also checked this http://akihabara.artificial-science.org/2009/12/installing-body-mount-tn-couplers/ I think the issue is mainly the catcher tonight I will attempt removal of all these and run it. Btw it runs fine as a 3 car but I would like to fix this issue now rather than in 2 years from now when I have my larger layout to run all 7 cars Link to comment
CaptOblivious Posted March 21, 2011 Share Posted March 21, 2011 Most MA trains include bits to permit the use of Kato truck-mount couplers; these are cheap and reliable, and might well solve both of your problems in one go. Did you model include a bag of curious, functionally-ambiguous plastic bits? Link to comment
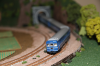
keitaro Posted March 21, 2011 Author Share Posted March 21, 2011 nah came with nothing. except the usual booklet and stickers. i think the issue is the part circled in attached picture. The rapidos have very limited up / down movement, with the tomix couplers they rub on the moulding for the door too tight to the bodyat same spots but the other sides of the car is fine i will try removing these see what happens. are there magnetic couplers that might stretch a touch farther than the tomix tn's ? not sure if this will be any better Link to comment
CaptOblivious Posted March 21, 2011 Share Posted March 21, 2011 THis might well be a case where the MA couplers are better, then! Being longer. Link to comment
keitaro Posted March 21, 2011 Author Share Posted March 21, 2011 I sent pm to fenway as he said he had this train maybe he can provide some good input to what he did. Link to comment
disturbman Posted March 22, 2011 Share Posted March 22, 2011 I'm sorry to hear you had problems with the Tomix TN couplers. I've upgraded quite a few MA trains myself and I never had any problems. I guess the radius of your curves are too tight. Link to comment
keitaro Posted March 22, 2011 Author Share Posted March 22, 2011 317mm ? i figured that would be fine. anyway took of the cather happens less now but still at points and on grades. When i build my bigger layout i will have to make sure i run it on a larger curve and longer straights before turn outs. Link to comment
Martijn Meerts Posted March 22, 2011 Share Posted March 22, 2011 317mm shouldn't be a problem for any coupler really. Usually the minimum radius goes up when adding more prototypical couplers, but I haven't seen a train that can't run through 317mm curves. Link to comment
disturbman Posted March 22, 2011 Share Posted March 22, 2011 No. 317mm should be fine enough. Did you try to run the train at a very low speed so you can observe the phenomenon that leads to the derailments? It might help to locate the problem. Also, do you have this problem with all your couplers or just some? From what I remember, if you don't install those couplers carefully enough they are going to get stuck and loose their elasticity. You should try to compare every couplers you installed by moving them with your fingers and see if they react the same way. Those couplers should be higly moveable and go back to their initial positions but they can be delicate to install. You can also compare those you installed with the ones (if you have still some) that are brand new. Link to comment
keitaro Posted March 22, 2011 Author Share Posted March 22, 2011 I conected the cars together and wiggle them about they seem to stretch both ways fine. There is occasional rubbing on the dorrl decal moulding which is part of the problem. it definately happens less now with the fron ppiece removed of the cars but is still happening. i'm wondering if i have a bad set the cars clip in to the shell deeper than most other trains. If i can get a picture of this i will later. I think the issue is a combination of -rubbing on the carriage door molding -couplers not liking grades and being flexable in a vertical direction (this covers both the rapido and tn couplers) the carriage shell doesn't lock in flush on all cars with the under carriage Link to comment
CaptOblivious Posted March 22, 2011 Share Posted March 22, 2011 the carriage shell doesn't lock in flush on all cars with the under carriage I bet that's the culprit. Sometimes MA models come, new, with the shell not quite assembled right. Follow up on this carefully, because I'm willing to bet that small adjustments (taking shell off, putting it back on) will yield better restults. Link to comment
keitaro Posted March 22, 2011 Author Share Posted March 22, 2011 I tried playing around with the shell and i can't seem to make it flush. If I pull the shell up to be flush it clicks like it is not locked in place and can easily slide of if I pick it up. first photo is how most cars are second is about as close as i can get it safely third is another close as possible with out being loose Link to comment
disturbman Posted March 23, 2011 Share Posted March 23, 2011 Maybe the picture is not good enough for my eyes but to me it look likes your TN coupler is hanging on the right side in your last picture. Which is wrong, it should always be centered. Link to comment
keitaro Posted March 23, 2011 Author Share Posted March 23, 2011 yeah it is a bit to the right but normally it's not i think i had moved it when playing with it's flexibility to go left / right Link to comment
disturbman Posted March 23, 2011 Share Posted March 23, 2011 That's the thing, the TN couplers are built in a way that the coupler should always come back to it's initial position. They don't stuck on one side, hang or whatever... That's why there is a spring. This means that the installation is in someway faulty. The spring might have come off or the coupler moved inside its casting. You might need to open it and try to put everything back to normal. That's a tedious job, I've done it on several occasion when couplers exploded in my hands while trying to fit them. There is a special technique to learn/find when you install these couplers. Don also had some issues installing those. http://akihabara.artificial-science.org/2009/12/17/installing-body-mount-tn-couplers/ Link to comment
keitaro Posted March 23, 2011 Author Share Posted March 23, 2011 yeah i had alook it's fine on that car i think though it was stuck on the moulding where the door between cars is. Link to comment
CaptOblivious Posted March 23, 2011 Share Posted March 23, 2011 I want to have a look at my Micro Ace models, because I am pretty sure that the bottom edge of the shell is, in general, not meant to be flush with the bottom surface of the frame; it should overhang just a little bit, which I think is what you are starting to notice. And this overhang is what is interfering with the couplers? Or is it the skirts on the cab ends? Link to comment
disturbman Posted March 23, 2011 Share Posted March 23, 2011 Exactly. The shell shouldn't go all the way down. It normaly click before going all the way down to the bottom surface of the frame. Link to comment
keitaro Posted March 23, 2011 Author Share Posted March 23, 2011 capt, The over hang is the issue with the motor car. With the other cars it's the skirts on the cab end. it twists down and around the frame and causes rubbing. So anyway I made a basic track on my kitchen table 2 x 280 and 1 x 140 s on one side 280mm for the corners both sides and 2 x 280s and one 541 l -15 turn out I had it setup 280mm > turn out > 280mm then onto the curve to make sure the car was straight when coming up to the curves. I filed a bit of the shell away that rubs just a touch. I then ran the full 7 car set as intended setup by the book. It makes the whole track but derails at the turn out ..... y I don't know because the car should be perfectly straight. I ran it at 30 speed made 3 loops and still derailed again after hitting the turn out. In other words as slow as you can get the train with out stuttery running. I repeat it's always a different car so can't narrow that down. I watch carefully and it didn't even look like from a coupler it's like the wheel just pops up and off and tries to go up the other track at the turn off while the other cars keep going straight. I am very glad my new 1720 does not do this. Link to comment
disturbman Posted March 25, 2011 Share Posted March 25, 2011 Maybe something to do with the wheels. You should check if they are as far apart as they should. :) Link to comment
keitaro Posted March 25, 2011 Author Share Posted March 25, 2011 hmm never thought of that didn't think they could all be off hah. Link to comment
Recommended Posts
Create an account or sign in to comment
You need to be a member in order to leave a comment
Create an account
Sign up for a new account in our community. It's easy!
Register a new accountSign in
Already have an account? Sign in here.
Sign In Now