Search the Community
Showing results for tags 'n gauge'.
Found 9 results
-
Hi guys, I'm finally feeling the urge to take the plunge and delve into making my very first permanent N scale layout from scratch starting from the bench work construction of a dedicated table to fully furnishing it with scenery. It'll be something I'll want to make taking inspiration from a few other Japanese layouts by members in the Japanese Railway Society and possibly some here. I'd like to make it a layout I can proudly display at convention centers and train shows (who wouldn't), without being sanguine for my first project. The name I have so far christened it with (桜木の湯線) is after the area I'm in as well as mentioning my love of cherry blossoms and hot springs. I'd like it to be a mostly steam JGR/JNR era fictional layout. There may be no catenary, but I'll have many EL that I like (EF13, EF65) running on it as well! The first stage in my mind is configuring the final track layout before the first shovelful of sod is turned. I'm using an app called "TrainDesign" to make a relatively complex track arrangement (hopefully not too advanced for my first layout) with KATO N Unitrack to fit within the confinement of space (a single table 1462 mm x 906 mm) I'm willing to spend in my apartment. Does anyone have experience using this, or would they recommend another program? The train table is something I'd really like to make the most of by having it be sturdy, portable and also presentable while still remaining practical and minimal in its embellishments. To give it a "Japanese" flavor, I'd like to stain and lacquer the wood finish of the fascia of the table and add ropes at the narrow ends for carrying it. A layout depicted below ("Yama no yu sen") built by Stephen Gomersall is said to have done such. Note the pedestrian bridge. I'm looking into more details about this layout for more inspiration. Any suggestions or advice? I thank you all for any help you can offer so I put my best foot forward! The layout will also strongly take inspiration from this depot model of a fictional Japanese roundhouse called "Kamanashi Kikanku" built by Phil Hendry. I hope to acquire the same or similar kits from which the roundhouse and turntable were built (Fleischmann). If anyone knows a good locale to purchase them, many thanks! I will soon shown the decided general track plan and rough sketches of the table I'll want to build for sociable critique before moving to the next stage; buying materials. Aside from the roundhouse mentioned above, I intend to have an engine house as well, merely since I'd like there to be plenty of space devoted to showing off my locomotives awaiting their next turn of duty. I have the three bay engine house kit that resembles the classic stone one in Hitoyoshi, one of my favorite landmarks on the line. I would however like to alter the color of the brickwork of the kit by making them a lighter shade (like the VoR shed below) to match the cedar woodwork of the table. If anyone has experience with kits such as what techniques or paints can be used to achieve this, much appreciated. Update (Nov 2, 2023): Here's the current track plan design courtesy of Doug Coster who rendered this for me in 3D. I'm pretty satisfied with it.

-
My beloved steam locomotives in my sizable N gauge collection can be temperamental gents and don't always run steadily, sometimes easily freezing while the throttle is up, especially at low speeds, and needing a pounding of the table or the "Hand of God' to push them into action again. I make sure that the track and wheels are squeaky clean, but my steam locomotives can still be fidgety and unsteady in their performance, meanwhile my diesels and electrics all run as smoothly as a sewing machine and can achieve low speeds without "sticking". My 58654, the jewel in the crown of my layout, curiously runs smoothly and flawlessly in reverse, while it has issues running forward. I was told it has to do with the tender drawbar as the tender wheels have pickups. Anything to improve the performance of my steam or any other locos would be welcomed.
-
A sizeable percentage British modellers, as many on here will no doubt be aware, seem strangely adverse to modern trains; particularly units. Sadly this attitude has extended to the main manufacturers, who lack the enlightened approach taken by their Japanese counterparts. The net result seems to be that some of our (i.e. the UK's) most stylish trains are not available as a ready to run model. What this means is that an alternative approach is required, by way of Kickstarter. A few months ago a project was set up to produce the class 390 Pendolino sets, operated by Virgin Trains along the West Coast Main Line between London and Scotland, in N Gauge. These will come in a number of guises, both in DC and DCC. If enough modellers back this project and it gets the go-ahead, then a full set will be available from £255, approx $400.00, (9 carriage version, DC) to £380.00, approx $600.00, (11 carriages, DCC). A recent development has confirmed Rapido will be the manufacturer. So, if anyone on here fancies an iconic train, for a very reasonable price, then take a look at the link below for more details. http://www.ngaugependolino.com/ There are also more details and discussion on here. Disclaimer: I am not involved in this project myself; but have put in an order for a full 11-car set... 🙂
-
Last year I completed this steam depot: It was mainly from parts supplied through a magazine subscription. I removed the original double-loop concept so I could run trains from it onto my main layout and have a second line onto the turntable. As the cat has always shown a keen interest, I have at long last found enough pieces of wood to build a box over it to protect it. A front flap gives access to the trains. A couple of 'port-holes' in the flap allows me to view it without having to open it each time. ... the cat is not happy!
- 38 replies
-
- 10
-

-
Hi, here is the layout I'm building. It has 2 independent layers, with two independent control panels (placed on the left and right hand side). The idea is that my two kids can play at the same time. Everything will be operated by an Arduino Mega board. Speed and direction of the trains will be controlled thanks to two LR293D IC connected to the Arduino. I will do the coding according to the control panel I've designed. The two control panels have switches for lights and other things like red light or the cable car, but right now I'll go through to the main part that operate the trains. From left to right (as shown on the picture), there is a FULL TOP switch – the equivalent of a hand-brake a HARD BRAKE button – to quickly decrease the speed a SOFT BRAKE button – to gently decrease the speed a HOLD switch – when turned on, the train maintains the current speed, if not it will slowly decelerate (unless the "increase speed" is being pushed). a INCREASE SPEED button – to accelerate a DIRECTION switch – to go forward or backward I've made a little "back door" underneath the layout. The Arduino board and the other boards are fixed to this door. All the cables are labelled and converge there. I try to make it as clean & clear as I can, for maintenance, future improvements and especially troubleshooting while coding the Arduino. Also, the little door is convenient since the layout is stored vertically (I don't have a lot of room, nor a man's cave 😔). Anyway, I can easily work on the electronics and cabling, while the layout is upright against the wall. That's it for now. I'll post more details through the next steps. I'll happy to reply if you have questions. I do have a question for the community tough. I've used Minitrix flexible track nailed directly on the 5mm plywood. I wonder if I should have put cork underneath the track. What's the purpose of it? reduce noise? easy track replacement? On the other hand, some of my turns are tight, and the nails+plywood hold everything in place very well. Bye for now
-
So I am hoping to install DCC sound into a Kato N scale D51 steam locomotive (product number 2016-8). I have the locomotive, but I have yet to purchase a decoder or speaker. I wanted to know if anyone else has done this or a similar project and if they have any recommendations for which decoder or speaker to use and if they have any tips for doing the conversion. Thanks in advance!
-
This is an 6' x 2' N gauge interurban layout that has been written up by gaugemaster.com as a preview of a September 2016 train show. http://www.gaugemaster.com/articles/guides/kuritu.html
- 16 replies
-
- 1
-
-
- gaugemaster
- exhibition
- (and 2 more)
-
Sooo... As many of you may know, there are plans to create some sort of Dutch Japanese T-Trak club, but apart from a standards guide and some try-outs by Toni and Martijn not much has been achieved yet except for postponing. I personally also came up with several ideas for prospective modules, but I never liked them enough to put them into reality. But more than that I couldn't decide what exactly I wanted to model. A double track suburban mainline; a single-track rural line; JR East; JR Shikoku; something completely different; etc. etc. Eventually I narrowed down my modelling interest to the Keihan Ōtsu Lines and JR Shikoku, but decided to go with the Ōtsu Lines for my T-Trak modules because it fits better in the limited space of the modules and the rolling stock is cheaper. :P I still want to make a layout for my JR trains one day, but that's for another time. If you think of the Keihan Ōtsu Lines there's one thing that will immediately pop-up in your mind: the street running section. The street-running section is located south and west of Hamaōtsu Station where the Keishin Line and the Ishiyama-Sakamoto Line join. I first wanted to incorporate Hamaōtsu Station in the modules including the famous intersection, but while it's a very interesting station, it's way too big for a small T-Trak module and just not really to my taste scenery-wise. I also wanted to replicate the siding east of Hamaōtsu Station (you need some sidings anyway and that way it would be prototypical as well), but that made the station+intersection+sidings way too long and resulted in spacing problems between the Unitram switch needed for the intersection and the normal Unitrack switches for the siding. All in all an interesting challenge, but it just wasn't really what I was looking for. Shinomiya Station Looking for a way to put a station, sidings and interesting scenery in a small space, I came across Shinomiya Station located on the Keishin Line and Ōmijingūmae Station on the Ishiyama-Sakamoto Line. Ōmijingūmae Station has some sidings and a maintenance facility near the station, but Shinomiya Station has sidings adjacent to the station platforms which means that it's possible to put everything together in a very small space. Shinomiya station also has some nicer scenery with a river crossing the tracks just west of the station. Because planning can't hurt I played a bit with Anyrail which resulted in this: (Module size: 1240 x 310 mm) The lengths of the platforms have to be at least 43 cm to provide space for the 4-car Keihan 800 series. Here you can see how it would look like with trains in the station: (blue = 16m long Keihan 800 series; green = 2-car 15m Keihan train; red = standard 20m 3-car EMU; yellow = maintenance vehicle) Apart from that this layout provides three platform tracks and sidings, it's also possible to change tracks using the middle platform track without causing a short circuit because of the power routing of the Unitrack turnouts and thus also shunting a train from the sidings to the outer track (below in the picture) should also be possible. The sidings are not really long enough to store an 800 series EMU, but as you can see with some creativity everything will fit. I could make the sidings longer by making them parallel to the main tracks, but that makes the view a bit boring. The main disadvantage of this plan is that the station will be four modules long with no way of making shorter modules because of how the tracks are arranged. 1240 mm is quite a length... There's one other problem: I don't really know which platform to use for the island platform. The distance between the centers of the tracks is 49.5mm, which means that Kato platforms which are made for 66mm spacing will not work. Tomytec/Tomix have some platforms with 25mm width, but I fear that those will be too narrow leaving ugly gaps between the train and the platform. Greenmax' city island platform is also too wide (40mm), but Greenmax' one-sided city platform could work being 30mm wide. I'm thinkin of kit-bashing the Greenmax side platform base with some roofs, but first I will have to measure everything. Street-running is still something I want to have somewhere of course, but I'll probably make a separate module or two for that.
-
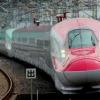
Hi. Im in tokyo now and just finished my yearly train shopping. I mainly bought kato trains and tomix tracks. I also got a few kato interior lighting kits to fix in my train. However, i don't really understand the instructions in the box. I also am not very confident in removing the top and bottom of my (shinkansen/commuter train) to fix the lighting. Anyone here knows how to remove the train cars and how to install the kato lighting kit? All help will be greatly appreciated. Thanks in advance! :^)